How do you bend in Inventor
By Emily Sparks
Click 3D Model tab Modify panel Bend Part .Use the Bend Line selector in the Bend Part dialog box to select the line about which the feature hinges or folds.Click the pop-up menu and choose how you want to define the bend: … Choose whether the part bends left, right, or both ways around the bend line.
How do you add a bend line in Inventor?
- On the ribbon, click Flat Pattern tab Manage panel Bend Order Annotation. …
- Right-click, and then click Sequential Reorder.
- Click the Bend Order glyph to number 1 in the sequence.
- Click the Bend Order glyph that you want to be next in the specified sequence. …
- When finished, right-click and then click Done.
How do you use the contour roll in Inventor?
- On the ribbon, click Sheet Metal tab Modify panel Unfold.
- Select a stationary reference at either end of the contour roll feature.
- Select the contour roll.
- Click Apply.
- Select a stationary reference on the now straightened section to begin the application of the second Unfold.
How do you bend sheet metal in Inventor 2020?
- Fix Edges.
- 45 Degree.
- Full Radius.
- 90 Degree.
- Flip Fixed Edge.
How do you change the bend radius in Inventor?
On the Notes and Leaders tab, select Bend Note Settings. If needed, edit the default bend note text in the edit field: Click Bend Direction, Bend Angle, Bend Radius, or kFactor in the Values and Symbols section to insert the corresponding property in the edit field.
How do you flatten sheet metal in Inventor?
In the ribbon, click Sheet Metal tab Flat Pattern panel , and then click either Go to Flat Pattern( ) or Go to Folded Part ( ) to switch to the other state.
How do you use the flange in Inventor?
On the ribbon, click Sheet Metal tab Create panel Flange . Select two coplanar edges that share a virtual corner. In the Flange dialog box, Corner tab, verify that Apply Auto-mitering is selected. Specify the flange parameters, and click OK.
How do you draw a cylinder in Inventor?
- On the ribbon, click 3d Model tab Freeform panel Cylinder . …
- Click a work plane, planar face or 2D sketch.
- Click in the graphics window to specify the base point of the cylinder.
- Change and adjust the shape by:
How do you change sheet metal thickness in Inventor?
Right-click a body and select Edit Sheet Metal Rule in the context menu. To assign body thickness do one of the following: Select Follow Defaults to set body thickness by the active standard. Clear the Follow Defaults checkbox and then click the drop-list to assign a unique body thickness from the list.
How do I merge in Inventor?- Click 3D Model tab Modify panel Combine .
- Using the Base selection arrow, choose the base solid body in the graphics window.
- Using the Toolbody selection arrow, select the solid bodies to combine with the base. …
- (Optional) Select Keep Toolbody. …
- Choose an operation for the combination: …
- Click OK.
How do you unwrap in Inventor?
- On the ribbon in a part file 3D Model tab Create panel Unwrap.
- Click the Advanced Settings Menu and enable Create Dedicated View Representation to create a view that displays only the flattened surface. …
- If desired, specify a preset. …
- Faces: In the graphics window, select one or more contiguous faces.
How do I edit a flat pattern in Inventor?
In the browser for a model flat pattern, right-click the flat pattern browser node, and then click Edit Flat Pattern Definition.
How do you show a flat pattern in Inventor?
- Click Place Views tab Create panel Base .
- In the Drawing View dialog box, select a sheet metal component as File.
- In the Sheet Metal View area, select Flat Pattern view.
- If appropriate, select or clear the selection of the Recover Punch Center option.
- Set other options in the Drawing View dialog, and then click OK.
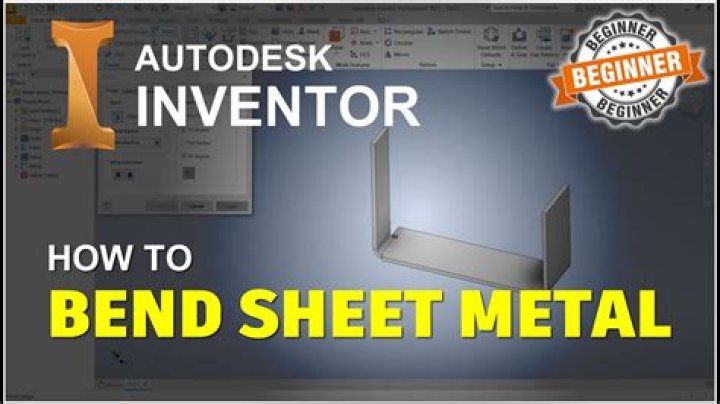
How do you bend sheet metal in Inventor?
- On the ribbon, click Sheet Metal tab Create panel Bend .
- Select a model edge on each sheet metal face.
- Optionally, on the Shape tab, specify one of the following to extend the bend:
How do you change the thickness of a contour flange in Inventor?
Click an open profile. If there are two or more solid bodies in the part file, click the Solids selector to choose the participating solid body. (Optional) If a body exists, click New Solid to create a new body. To change the direction for the thickness of the flange, click a selection in Offset Distance.
What thickness is sheet metal?
The thickness of sheet metal starts from 0.5 mm and goes up to 6 mm. Anything above that is a metal plate. The thin sheet metal is easy to form, while still providing great strength.
Why RIP is used in sheet metal?
Use the rip tools to tear a continuous piece of sheet metal material so that when you unbend a design, it tears along the ripped section. … Edge Rip—Tears the sheet metal along an edge. You can define edge treatment for the ripped edges.
How do you make an angled hole in Inventor?
- Start a new sketch on the desired face.
- Draw a line to act as the hinge for the angle of the hole. …
- Draw a point at the desired hole center.
- Fully constrain the sketch.
- Create a work plane at an angle to the face through the sketched line.
How do you make a face on inventor?
- On the ribbon, click 3D Model tab Sketch panel Create 2D Sketch and select a face or work plane as the sketch plane.
- Use a command on the Sketch tab to create an open or closed profile to represent the shape.
How do you split your face in Inventor?
- Create a part and position a work plane, or sketch a 2D parting line on a part face or work plane. …
- Click 3D Model tab Modify panel Split to split a part into multiple bodies, or to trim and remove one side. …
- In the feature dialog box, click Split Face .
How do you join two parts in Inventor?
- Assembly (iam) file: On the ribbon, click Assemble tab expand the Simplification panel and click Create Simplified Part.
- Specify the Combine Style. You can choose between: …
- Specify the filename, file template, and the location where the file will be saved.
- Click OK.
How do you create an unfolded view in Catia?
- In the Drafting window, click Unfolded View in the Views toolbar ( Projections sub-toolbar).
- Select a surface on the part. This will automatically use the sheet metal reference wall plane. …
- Click on the sheet. The unfolded view is displayed. …
- Select one of the axis lines.
How do I create a bend in Autocad?
- In the drawing area, select a pipe that has an open port.
- At the end of the pipe, click a Continuation grip.
- On the ribbon, click Home tab Part Insertion panel Toggle Pipe Bends to enable pipe bends.
How do you bend a shape in Autocad?
- Select the geometry you want to bend. These are Targets and can be NURBS surfaces, meshes, and curves.
- Choose Object Edit > Dynamic Shape Modeling > Bend Rig from the tool palette. …
- Select a single curve or a continuous sequence of curves as the bend axis.
How do I bend a line in Autocad?
- In an active 3D sketch with lines, click 3D Sketch tab Draw panel Bend .
- In the Bend dialog box, specify a Radius.
- (Optional) Deselect Equal to prevent automatic constraints. …
- In the graphics window, click any line, sketch point, or included geometry to start the bend.